Introduction
The Mod Your Nintendo Switch has gained popularity not only as a gaming console but also as a versatile device capable of running homebrew software and custom firmware.
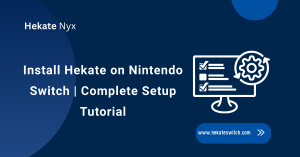
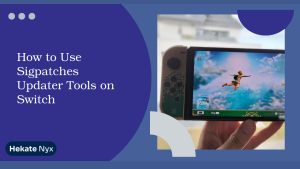
One of the key tools used in modding the Switch is Hekate, a custom bootloader that allows users to access a variety of features such as custom firmware installation, NAND backup, and more. In this guide, we’ll walk you through the process of Mod Your Nintendo Switch using Hekate, step by step.

What You’ll Need?
Before you begin, make sure you have the following:
Hardware:
- Nintendo Switch: Any Mod Your Nintendo Switch (original or Lite) has the potential to be modded with Hekate, but the success rate depends heavily on the specific model and its software version. Generally, newer Switch models are much harder or even impossible to mod.
- SD Card: A microSD card with at least 32GB of storage is recommended. Make sure it’s formatted to the FAT32 file system before using it.
- Computer: A Windows PC, Mac, or Linux computer will all work. You’ll need it to download the necessary files and perform the modding process.
- USB Type-C Cable: A standard USB Type-C cable is required to connect your Switch to your computer for transferring files.
Optional (Depending on the Modding Guide):
- RCM Jig: An RCM jig is a small, custom hardware tool that helps put your Switch into RCM (Recovery Mode). This mode is essential for injecting the Hekate payload. You can buy one online or create your own using specific wires and paperclips (refer to your chosen modding guide for instructions).
Software
The specific software files will vary depending on the Mod Your Nintendo Switch guide you follow. Here’s a general idea:
- Hekate Payload: This is the main file that launches Hekate, the custom bootloader, on your Switch. Search online for “[Switch Model] Hekate Payload Download” to find the latest version.
- Atmosphere Custom Firmware (CFW): Atmosphere is a popular CFW for the Nintendo Switch. It replaces the original firmware and allows you to run homebrew software and access other modding features. Look for “[Switch Model] Atmosphere CFW Download” to find the appropriate files.
- Additional Software: Depending on the modding guide, you might need additional software tools for formatting your SD card, injecting the Hekate payload, or managing your CFW. The specific software will be mentioned in the guide you follow.
Step 1: Downloading Necessary Files
This is the first crucial step before diving into the Mod Your Nintendo Switch. Here’s a detailed breakdown of the files you’ll need:
Essential Files:
- Hekate Payload: This is the key that unlocks the door to Mod Your Nintendo Switch. Hekate is a custom bootloader that replaces the stock Switch bootloader and provides access to various options like launching CFW, creating backups, and managing homebrew.
- Where to Download: Always download Hekate from a reputable source to avoid malware or corrupted files. The official source is the CTCaer GitHub repository. You can find it by searching online for “[Switch Model] Hekate GitHub Download”. This will lead you to the latest version compatible with your specific Switch model.
- Custom Firmware (CFW): The CFW essentially replaces the stock Switch operating system with a modified version that allows you to run unauthorized software and access additional features. Here are some popular choices:
- Atmosphere CFW: A widely used and well-supported CFW known for its stability and ease of use.
- ReiNX CFW: Another popular option with a focus on simplicity and user-friendliness.
- *SX OS CFW (Less recommended due to potential discontinuation and legal issues) : A feature-rich CFW, but its development seems to have stopped, and there are concerns about its legal status.
Downloading Your Chosen CFW: Similar to Hekate, download your preferred CFW from a trusted source. Search online for “[Switch Model] [CFW Name] Download”.
Make sure the source is reputable and the files match your specific Switch model.
Optional Files:
Homebrew Applications: Homebrew apps are unofficial software that expand the functionality of your modded Switch. They can include:
- Emulators: Play games designed for other consoles on your Switch.
- Custom Themes: Personalize the look and feel of your Switch’s interface.
- Utilities: Enhance your modding experience with tools for managing files, backups, and more.
Downloading Homebrew Apps: There are various repositories online that host homebrew applications. Search for “[Switch Model] Homebrew Apps Download” to find reputable sources. Be cautious when downloading homebrew apps, as some might be malicious.
Step 2: Preparing Your SD Card
Now that you have all the necessary files downloaded, it’s time to prep your SD card for use with Hekate and any homebrew applications. Here’s a detailed breakdown of the process:
Formatting the SD Card:
FAT32 vs. exFAT: There are two main file systems suitable for your Switch’s SD card: FAT32 and exFAT. Both work well, but here’s a quick comparison:
- FAT32: Universally compatible with most devices, including the Switch. However, it has a maximum file size limit of 4GB. This might be an issue if you plan to store large game files on your SD card.
- exFAT: Overcomes the file size limit of FAT32, allowing for larger files. However, exFAT compatibility isn’t as widespread as FAT32. Some devices might not recognize exFAT-formatted drives.
For the sake of broader compatibility, especially during the initial modding process, formatting to FAT32 is recommended.
Formatting Tools: You can format your SD card using your computer’s built-in formatting tools or a third-party formatting application. Here’s a general guide:
- Connect your SD card to your computer.
- Open the disk management tool (Windows) or Disk Utility (Mac).
- Locate your SD card drive.
- Right-click on the SD card drive and select “Format” (Windows) or “Erase” (Mac).
- Choose FAT32 (or exFAT if you prefer) from the file system options.
- Assign a volume label (optional) and click “Start” (Windows) or “Erase” (Mac) to begin formatting.
Creating Folders:
Once your SD card is formatted, you need to create a specific folder structure to house the Hekate payload and any future homebrew applications.
- Root Directory: The very first directory you see when you open the SD card is called the root directory.
- “switch” Folder: Create a new folder named “use hekate Switch (all lowercase) directly on the root directory of your SD card. This folder will serve as the central location for your modding files.
Copying Files:
- Hekate Payload: Now it’s time to transfer the downloaded Hekate payload file (usually named hekate_ctcaer.bin) to the SD card. Copy and paste the file into the “switch” folder you just created.
- Custom Firmware (Optional): If you downloaded a custom firmware (CFW) in Step 1, follow the specific instructions provided with that CFW. These instructions will typically detail which files need to be copied and where they should be placed on your SD card’s folder structure. The destination folders might be different from the “switch” folder you created earlier.
Double-Checking:
Before Mod Your Nintendo Switch, ensure all the necessary files are copied correctly to their designated locations on your SD card. Double-check that the Hekate payload file is present in the “switch” folder.
Step 3: Entering RCM Mode (Recovery Mode)
This step involves putting Mod Your Nintendo Switch into a special mode called RCM (Recovery Mode). RCM allows injecting custom payloads like Hekate, which is crucial for modding your Switch.
Here’s a detailed breakdown of how to enter RCM mode:
1. Power Off Your Switch Completely:
- Ensure your Switch is fully powered off and not in sleep mode. Hold down the power button for a few seconds until the power menu appears.
- Select “Power Off” and wait for the Switch to shut down entirely.
2. Preparing Your Switch for RCM Mode:
This step involves shorting specific pins in the right Joy-Con rail to trick the Switch into entering RCM mode. However, the method depends on your Switch model:
- Early Model Switches (Pre-July 2018): You can typically enter RCM mode without any additional tools. Simply hold down the volume up button (+) and the power button together while powering on the Switch.
- Later Model Switches (Post-July 2018): These models require a jig (a small hardware tool) or a specific paperclip method to short the necessary pins.
- Finding RCM Entry Instructions: Due to the model variations, it’s crucial to find specific instructions for your Switch model. Search online for “[Switch Model] Enter RCM Mode” or “[Switch Model] RCM Jig”. Reputable sources like modding forums or video tutorials will provide clear instructions and visuals for your hekate switch sigpatches.
- Important Note: Improperly shorting the pins can damage your Switch. Follow the instructions carefully and use the correct method for your model.
3. Connecting Your Switch to Your Computer:
- Once you’ve successfully entered RCM mode (your Switch screen will likely be blank), connect it to your computer using a USB Type-C cable.
- The computer should recognize your Switch in RCM mode, which will be used in the next step for injecting the Hekate payload.
Step 4: Launching Hekate – Taking Control with the Custom Bootloader
Now that Mod Your Nintendo Switch is in RCM mode and connected to your computer, it’s time to launch Hekate Switch, the custom bootloader that unlocks the modding potential.
1. Running a Payload Injector:
You’ll need a software tool called a payload injector on your computer. This tool acts like a bridge, sending the Hekate payload file from your computer to your Switch in RCM mode.
- Popular Payload Injectors: Here are some popular and reliable payload injector options:
- TegraRCMGUI: A user-friendly injector with a graphical interface, making it easy for beginners.
- Rekado: Another well-regarded injector known for its simplicity and efficiency.
- Downloading and Running the Injector: Download the chosen injector tool from a trusted source (search online for “[Payload Injector Name] Download”). Once downloaded, run the injector program on your computer.
- Connecting to Your Switch: The injector tool should automatically detect your Switch in RCM mode. If not, there might be a setting you need to adjust in the injector program. Refer to the injector’s documentation for assistance.
2. Injecting the Hekate Payload:
- Once the injector recognizes your Switch, locate the “Browse” or “Select File” button in the injector program. Use this button to navigate to the Hekate payload file (usually named hekate_ctcaer.bin) that you downloaded and placed on your SD card in Step 2.
- Initiating the Injection: After selecting the Hekate payload file, there will typically be an “Inject” or “Send” button in the injector program. Click this button to initiate the payload injection process. The injector will send the Hekate payload to your Switch.
- Visual Confirmation: If successful, you might see a brief message on the injector program confirming successful injection. On your Switch screen, you should see the Hekate logo appear, indicating it’s ready for your commands.
Step 5: Installing Custom Firmware
Once Hekate is running on your Switch, you can proceed to install custom firmware:
Navigate the Hekate Menu: Use the touchscreen or volume buttons on your Switch to navigate through the Hekate menu.
Select Tools > Archive Bit > Setup EmuMMC: This will create an EmuMMC (Emulated NAND) which allows you to safely experiment with custom firmware without risking your original NAND.
Launch CFW: Return to the main Hekate menu and select “Launch” to boot into your preferred custom firmware.
Step 6: Enjoying Your Mod Your Nintendo Switch
Congratulations! You’ve successfully Mod Your Nintendo Switch using Hekate. Now you can enjoy a variety of homebrew applications, custom firmware features, and other exciting possibilities on your device. Remember to always stay informed about the risks involved in modding your Switch and to use reputable sources for downloading files and instructions.
Conclusion
Mod Your Nintendo Switch using Hekate opens up a world of possibilities, allowing you to customize your gaming experience and explore homebrew applications.
By following this guide carefully and using trusted sources, you can safely and effectively modify your Switch to suit your preferences. Remember to respect the terms of service of Nintendo and to use your modded Switch responsibly. Happy modding!
FAQs
What is modding, and why would I want to mod my Nintendo Switch?
Mod Your Nintendo Switch, short for modification, refers to the process of altering a device’s software or hardware to change its functionality or behavior. People mod their Nintendo Switch consoles for various reasons, including running homebrew applications, customizing the User interface, and accessing features not officially supported by Nintendo.
What is Hekate, and how does it relate to Mod Your Nintendo Switch?
Hekate bootloader is a custom firmware bootloader for the Nintendo Switch. It provides advanced features like NAND backup, partition management, and the ability to launch custom firmware or payloads. Hekate is often used as part of the process to mod a Nintendo Switch console.
Is Mod my Nintendo Switch legal?
While modding itself is not inherently illegal, it can void your warranty and may violate the terms of service set by Nintendo. Additionally, using modded consoles to play pirated games or cheat online can lead to legal consequences. It’s essential to understand the risks and potential legal ramifications before modding your Switch.
What are the steps to Mod Your Nintendo Switch using Hekate?
Mod Your Nintendo Switch typically involves several steps, including:
- Gathering necessary tools and files, such as the Hekate payload and custom firmware files.
- Preparing an SD card with the required files and formatting it correctly.
- Injecting the Hekate payload into your Switch using a compatible tool or method.
- Accessing the Hekate menu and performing actions like NAND backup, partition management, or launching custom firmware.
Can I use Hekate to install custom firmware on my Nintendo Switch?
Yes, Hekate can be used to install and launch custom firmware or other payloads on your Nintendo Switch. Once you’ve booted into the Hekate menu, you can select the option to launch a custom firmware of your choice.
What precautions should I take before modding my Nintendo Switch?
Before Mod Your Nintendo Switch, it’s crucial to research thoroughly and understand the process. Some precautions to consider include:
- Backing up Mod Your Nintendo Switch NAND to ensure you can restore your console if something goes wrong.
- Using reputable sources and tools to avoid malware or bricking your device.
- Being aware of the risks involved, such as voiding your warranty or potentially damaging your console.
Can I revert my Nintendo Switch to its original state after modding it with Hekate?
Yes, if you’ve backed up your Switch’s NAND before modding it with Hekate, you can revert your console to its original state by restoring the NAND backup. This process effectively returns your Switch to its state before any modifications were made.
Where can I find help and support for modding my Nintendo Switch using Hekate?
There are several online communities, forums, and websites dedicated to Mod Your Nintendo Switch and hacking. These platforms often provide guides, tutorials, and support from experienced users who can help you with the modding process and troubleshooting any issues you encounter. However, exercise caution and ensure you’re obtaining information from reputable sources.
Latest Post