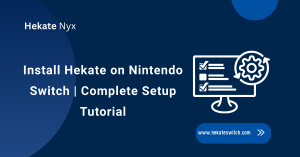
Introduction
Boot Hekate on Nintendo Switch is a popular boot loader for modded Nintendo Switch consoles. It provides a user-friendly interface to manage various options, including launching custom firmware (CFW) like Atmosphere, accessing the homebrew menu, and tinkering with system settings.
This guide will walk you through the process of Boot Hekate on Nintendo Switch.
Before You Begin
Boot Hekate on Nintendo Switch, you’ll need a modded Nintendo Switch with Hekate Switch already installed and a microSD card containing the necessary Hekate files.

If you haven’t modded your Switch yet, this process is not recommended as it can potentially damage your console.
Prerequisites
Before diving into the process, ensure you have the following:
- A Nintendo Switch console
- A compatible microSD card (preferably with ample storage space)
- A computer with internet access
- A reliable USB-C cable
Understanding the Role of Hekate Bootloader
Hekate is not just a payload injector—it’s a powerful bootloader that acts as a bridge between your Switch and multiple configurations like Atmosphere, emuMMC, or Stock OS.
What Does the Bootloader Actually Do?
The bootloader is responsible for:
- Initializing system hardware
- Verifying SD card setup
- Managing multiple launch configurations
- Providing access to tools like NAND backup, emuMMC setup, and more
This modular design allows advanced users to customize how and where the Switch boots, giving unparalleled control compared to other CFW launchers.
Downloading Hekate
For Boot Hekate on Nintendo Switch open your preferred web browser on your computer and navigate to the official GitHub page of Hekate.
Locate the latest release of Hekate and download the necessary files. Ensure you’re downloading from a reputable source to avoid any risks associated with unofficial versions.
Preparing the microSD Card
Insert the microSD card into your computer using an adapter if needed.
Format the microSD card to FAT32 or exFAT file system. Ensure to back up any existing data on the card, as formatting will erase all contents.
Once formatted, create a new folder named “hekate” (without quotes) on the root of the microSD card.
Copy the Hekate files you downloaded earlier into the newly created “hekate” folder.
Entering RCM Mode
Before Boot Hekate on Nintendo Switch, you’ll need to enter the Switch’s Recovery Mode (RCM). Follow these steps:
- Power off your Nintendo Switch completely.
- Attach the USB-C cable to your Switch and connect it to your computer.
- Depending on your Switch model, use the appropriate method to enter RCM mode:
- For older Switch models (pre-Mariko), you can use a jig or a paperclip to short the pins in the right joy-con rail.
- For newer Switch models (Mariko or later), you might need to use a hardware exploit such as a modchip or an RCM loader.
- Once in RCM mode, your Switch screen will remain black, indicating it’s ready for the next step.
Switch Not Entering RCM Mode?
RCM (Recovery Mode) is essential for booting payloads, such as Hekate. If your Switch refuses to enter RCM mode, the problem likely lies in the hardware trigger, USB connection, or software detection.
Troubleshooting RCM Entry
- Use a Verified Jig: Make sure pins 1 and 10 are bridged cleanly on the right Joy-Con rail.
- Test with TegraRCMGUI: The app should say “RCM device detected” when the Switch is connected.
- Ensure Full Shutdown: From the Power menu, hold Power for 15 seconds, then attempt RCM entry.
- Try AutoRCM: If manual entry fails consistently, consider enabling AutoRCM to boot into RCM by default.
Always keep your battery charged above 30% when entering RCM to avoid instability.
Boot Hekate on Nintendo Switch
On your computer, launch a tool like TegraRcmGUI or a similar program designed for injecting payloads to the Switch.
Select the Hekate payload file you downloaded earlier and inject it into your Switch using the chosen tool.
If successful, your Switch screen will display the Hekate menu, providing various options and functionalities.
How to Reboot to Hekate from Atmosphere
Sometimes you need to access the Hekate bootloader even after your Switch has already booted into Atmosphere. Whether you’re switching launch configurations or performing maintenance tasks, it’s easy to reboot directly into Hekate without using a PC or RCM injector again.
Rebooting to Hekate via Homebrew Menu
If you’re already in Atmosphere, just launch the Homebrew Menu, open Payload Launcher (or use TegraExplorer, if installed), and select the Hekate payload. Your Switch will gracefully exit Atmosphere and boot directly into Hekate’s graphical interface.
Rebooting to Hekate via Power Options
Alternatively, you can hold the Power button > select Power Options > Restart. If Autoboot is disabled or configured to boot into Hekate by default, this method will also bring you back into Hekate on restart.
Booting Methods
There are two primary ways to Boot Hekate on Nintendo Switch:
- Holding Volume Down During Startup (Default Method): This is the most common method. Simply power down your Switch completely. Then, while holding down the Volume Down button, press and hold the Power button to turn it back on. Continue holding the Volume Down button until you see the Hekate menu appear on the screen.
- Using Software (if applicable): Some custom software applications might offer options to inject the Hekate payload directly. This can be a convenient alternative if available on your chosen software. Additionally, some CFW like Atmosphere might have a “restart to Hekate” option within their menus.
Navigating Hekate Menu
Once you’ve booted into Hekate, you can navigate through its menu using the volume buttons to scroll and the power button to select. Here are some common options:
- Launching the custom firmware (CFW)
- Accessing the Homebrew Menu
- Performing system backups and restores
- Managing NAND backups
- Applying system patches and modifications
How to Launch Atmosphere from Hekate
Once you’ve successfully booted into Hekate, launching Atmosphere is straightforward—but doing it the right way ensures stability and compatibility, especially with future updates.
Using the Launch Menu in Hekate
From Hekate’s main menu, tap on Launch. You’ll see multiple configurations such as:
- CFW (sysNAND)
- CFW (emuMMC) (if configured)
- Stock (sysNAND)
Choose CFW (sysNAND) to boot into Atmosphere on your Switch’s internal memory. This is the most common setup for most users.
Verifying Atmosphere Launch
After launching, your Switch should boot into the familiar Atmosphere splash screen. You can verify a successful boot by opening the System Settings and scrolling down—you’ll notice an “AMS” tag next to the firmware version.
Additional Considerations
- Autoboot Settings: Boot Hekate on Nintendo Switch offers the option to set an autoboot configuration. This allows you to choose whether you want to launch directly into your CFW, the official Nintendo Switch firmware (OFW), or another option upon startup. You can access and adjust these settings within the Hekate menu itself.
- Troubleshooting Boot Issues: If you encounter any difficulties Boot Hekate on Nintendo Switch, there could be several reasons. Make sure the microSD card containing the Hekate files is properly inserted. You can also try reinstalling Hekate following a guide specific to your Switch model and CFW.
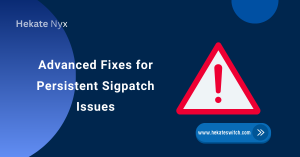
Fix: Hekate Menu Not Showing Up
Encountering a black screen or missing bootloader menu when injecting the Hekate payload? This issue is more common than you’d think and usually easy to resolve.
Possible Causes and Solutions
- Corrupted SD Card: Reformat the SD card to FAT32 and reload the Hekate files.
- Wrong Payload Injected: Double-check that you’re injecting the correct version of hekate_ctcaer.bin.
- File Structure Errors: Ensure that /bootloader and /hekate_ipl.ini exist on the root of your SD card.
- RCM Not Properly Triggered: If you’re stuck at a black screen, your device may not have entered RCM at all.
Use TegraRCMGUI to verify a successful RCM connection before injection.
How to Disable Autoboot in Hekate
Autobooting is convenient, but sometimes you need direct access to Hekate without it automatically launching into Atmosphere or another config. Disabling Autoboot ensures you always land in the menu first.
Steps to Disable Autoboot
- Boot into Hekate
- Navigate to Options > Auto Boot
- Select Disabled
- Tap Save Config
This change will persist across reboots. If needed, you can always re-enable it the same way.
Why Disable Autoboot?
Disabling autoboot is useful for:
- Managing emuMMC configurations
- Changing payloads
- Updating Hekate or Atmosphere without immediate launch
Conclusion: Boot Hekate on Nintendo Switch
Booting up Hekate on your Nintendo Switch opens up a world of possibilities, allowing you to customize your gaming experience and explore a vast array of homebrew applications and modifications.
However, it’s crucial to proceed with caution and adhere to legal and ethical guidelines when utilizing Custom firmware. With this guide, you should now be equipped to safely boot Hekate on Nintendo Switch and unlock its full potential.
FAQs
What is Hekate?
Hekate is a custom bootloader for the Nintendo Switch console, offering advanced features such as NAND backup/restore, partition management, and launching custom firmware (CFW) or payloads.
Why would I want to use Hekate?
Hekate provides users with greater control over their Nintendo Switch, enabling them to run custom firmware, and homebrew software, and perform various system-level tasks not possible with the official firmware.
How do I install Hekate on my Nintendo Switch?
You can install Hekate by first setting up custom firmware (CFW) on your Switch using tools like loading fss0 Atmosphere or SX OS. Once CFW is installed, you can use a homebrew application like TegraExplorer to inject the Hekate payload into your Switch.
What is a payload?
A payload is a small piece of code that is injected into the Nintendo Switch’s memory to perform a specific task. In the case of Hekate, the payload is used to launch the custom bootloader.
How do I boot into Hekate?
mod your Nintendo Switch you need to initiate the payload injection process while the Switch is in its RCM (Recovery Mode) state. This is typically done using a compatible USB-C dongle or by shorting specific pins on the Joy-Con connector with a jig.
Can I brick my Nintendo Switch by using Hekate?
While there are risks associated with modifying any device’s firmware, following instructions carefully and using reputable tools significantly reduces the likelihood of bricking your Switch. It’s essential to research thoroughly and understand the process before attempting any modifications.
Is using Hekate legal?
The legality of using custom firmware and bootloaders like Hekate on the Nintendo Switch can vary depending on your jurisdiction and how you use them. Generally, modifying hardware and software may void warranties and violate terms of service, but it’s essential to consult legal experts or relevant laws in your area for specific guidance.
Can I play pirated games with Hekate?
Hekate itself does not enable piracy. However, installing custom firmware may allow users to run pirated games or software, which is illegal and against the terms of service of the Nintendo Switch. It’s essential to respect intellectual property rights and use homebrew software responsibly.
Latest Post