Introduction
Auto Boot to Atmosphere, unleash the full potential of your Nintendo Switch with custom firmware (CFW)! For gamers who crave more control and customization, CFW opens a world of possibilities. But venturing into Switch modding can seem complex.
This guide will be your roadmap, introducing popular CFW options like Atmosphere and Hekate Switch, and explaining the benefits of auto-booting to CFW, including faster boot times and direct access to your desired CFW.
Let’s dive in and explore [How to Auto Boot to Atmosphere/ Hekate on your Nintendo Switch!
Throughout this guide, we’ll cover essential concepts like “Switch modding guide,” “CFW benefits,” and “bootloader options,” to ensure you have a comprehensive understanding of customizing your Switch experience.

Understanding Auto Boot to Atmosphere and CFW: Power Up Your Switch Experience
How to Auto Boot to Atmophere / Hekate on your Nintendo Switch hinges on two key concepts: auto booting and Custom Firmware (CFW). Let’s break them down:
Auto Booting: Imagine turning on your Switch and bypassing the stock Nintendo logo, landing directly in your preferred CFW environment. That’s the magic of auto-booting! It streamlines the boot process, saving you valuable time and streamlining your access to the CFW features you crave.
Custom Firmware (CFW): The official Nintendo Switch firmware dictates how your console operates. CFW, on the other hand, is a custom-made operating system that unlocks a treasure trove of possibilities. Popular options like Atmosphere and Hekate offer functionalities like:
- CFW Booting: They act as the bridge between your Switch and the CFW environment. With auto booting configured, your chosen CFW launches automatically upon startup.
- Managing Partitions: CFW often utilizes a feature called EmuNAND, essentially creating a virtual environment for running CFW applications without affecting your official Nintendo Switch oled software. Tools within Atmosphere and Hekate allow you to manage these partitions and ensure a smooth CFW experience.
RCM Mode and Payload Injection: Launching CFW typically involves entering a special mode called RCM (ReiNX Custom Mode). This mode allows for injecting a “payload,” a small program that instructs your Switch to boot into the CFW environment. Auto booting aims to bypass the manual RCM entry and payload injection steps, offering a seamless transition into CFW.
Stocking Up for Your Switch Modding Adventure
Before embarking on your Auto Boot to Atmosphere journey, ensure you have the necessary tools to unlock the full potential of your Switch. Here’s a breakdown of the essential hardware and software:
Hardware:
- Modchip/RCM Loader: While some advanced techniques involve modchips, most Auto Boot to Atmosphere setups rely on an RCM loader. This small device helps enter the crucial RCM mode, which is a prerequisite for injecting CFW payloads. (Focus keyword note: When choosing an RCM loader, ensure compatibility with your specific Switch model for a smooth process.)
- SD Card: Your trusty SD card plays a vital role. Opt for a reliable brand with sufficient storage capacity to house your CFW files, saves, and any additional applications you plan to use. (Focus keyword note: Proper SD card formatting is crucial for successful modding. Refer to a reputable guide to ensure your SD card is prepped correctly.)
Software:
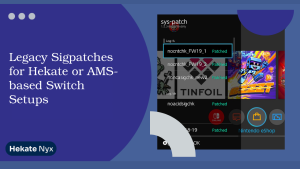
- CFW Files: This is where the magic happens! Depending on your preference, you’ll need the appropriate CFW files for Atmosphere or Hekate (or potentially others). A reputable CFW selection guide can help you choose the CFW that best suits your modding goals.
Underlying Hardware Platform: It’s worth mentioning that the Nintendo Switch uses the Tegra chip from Nvidia as its core hardware platform, which is essential for running custom firmware through tools like Hekate Nintendo Switch. Understanding this can be helpful when researching specific tools and compatibility for your Switch model.
How to Auto Boot to Atmosphere vs Hekate?
Auto Boot to Atmosphere, now that you’re armed with the essential tools, let’s delve into the heart of the matter: choosing the ideal auto boot option between Atmosphere and Hekate.
Direct Boot to Atmosphere:
If speed is your priority, auto booting directly to Atmosphere might be your perfect match. This configuration eliminates the need for intermediary menus, allowing you to land straight into your CFW environment with minimal wait time.
This streamlined approach is ideal for users who primarily utilize Auto Boot to Atmosphere and have a clear modding purpose in mind.
Hekate Menu Options:
Hekate, on the other hand, takes a different approach. It acts as a central hub, offering a menu that lets you select various payloads, including Atmosphere. This flexibility is a boon for troubleshooting purposes.
Additionally, some users prefer the peace of mind of having a backup option readily available through the Hekate menu.
Reboot to Hekate with reboot_payload.bin:
Even if you configure Auto Boot to Atmosphere directly to Atmosphere, there’s a clever trick to maintain access to Hekate. A file named “reboot_payload.bin” can be placed on your SD card. When triggered within Atmosphere (often through specific button combinations), this file can initiate a reboot back into Hekate Switch. Simply use Hekate Switch to regain full control and customization of your device.
This configuration offers a safety net, allowing you to access Hekate’s menu if needed, even with auto boot to Atmosphere enabled.
The Auto Boot to Atmosphere Activation Guide
With your chosen Auto Boot to Atmosphere champion selected (Atmosphere or Hekate), it’s time to unlock the magic of streamlined CFW access! This section provides a detailed guide on enabling Auto Boot to Atmosphere for your preferred option.
Important Note: Modifying system files can be risky. Always proceed with caution and ensure you have a recent backup of your SD card contents before making any changes. Refer to reputable Switch modding guides for detailed backup instructions specific to your setup.
Auto Booting to Atmosphere: Streamlined Access
For those who prioritize speed and a direct jump into Atmosphere, here’s how to configure auto boot:
- Locate hekate_ipl.ini: Access your SD card’s root directory and locate the file named “hekate_ipl.ini.” This file serves as the configuration hub for Hekate.
- Edit hekate_ipl.ini: Open the file using a text editor. Locate the line that reads “autoboot_payload = [“”]”. This line dictates the payload that Hekate automatically boots.
- Configure for Atmosphere: Replace the bracketed quotation marks “[]” with the following path: “hos:/atmosphere/hos_loader.nro”. This instructs Hekate to boot the Atmosphere payload upon startup.
- Save Changes: Save your edits to the “hekate_ipl.ini” file.
Alternative Method (if applicable): Some versions of Hekate might offer a graphical user interface (GUI) for enabling auto boot. Consult your specific Hekate documentation to see if a GUI option exists.
Auto Booting to Hekate: Maintaining Menu Control
If you prefer the flexibility of Hekate’s menu for payload selection, here’s how to configure auto boot:
- No Configuration Needed: By default, Hekate is designed to launch its menu upon startup. No modifications are necessary to achieve auto boot to Hekate’s menu.
- Reboot to Hekate (Optional): As mentioned earlier, even with Atmosphere as your primary boot target, you can maintain access to Hekate’s menu. Place a file named “reboot_payload.bin” on your SD card’s root directory. This file, when triggered within Atmosphere (often through specific button combinations), can initiate a reboot back into Hekate.
Troubleshooting Auto Boot Hiccups
Even the most meticulous modders can encounter occasional bumps in the road. Here, we’ll tackle common auto boot issues and equip you with solutions to get your Switch humming along smoothly.
Auto Boot Failure – Identifying the Culprit
If your Switch isn’t auto booting as expected, don’t fret! Here are some common culprits to investigate:
- File Errors: Typos or errors within the “hekate_ipl.ini” file can derail your Auto Boot to Atmosphere plans. Double-check your edits for any mistakes, ensuring the path to the desired payload is spelled correctly.
- Incorrect Settings: Did you choose the appropriate payload path in the “hekate_ipl.ini” file? (Focus keyword note: Refer back to the auto boot configuration steps for your chosen option – Atmosphere or Hekate – to ensure you’ve implemented the correct settings.)
- SD Card Blues: Improper SD card formatting can throw a wrench into the works. Consult a reputable guide to verify your SD card is formatted correctly for Switch modding.
Curing the Hiccups – Solutions for a Smooth Auto Boot
Now that we’ve identified potential roadblocks, let’s explore solutions to get your auto boot ship sailing smoothly:
- Reverify File Paths: Meticulously examine the path specified in the “autoboot_payload” line within “hekate_ipl.ini”. Ensure there are no typos or incorrect folder names.
- Double-Check Configuration: Review the auto boot configuration steps for your chosen CFW (Atmosphere or Hekate). Did you follow the instructions precisely?
- SD Card Reformation: If you suspect SD card formatting is the issue, reformat the card using a reputable guide specific to Switch modding. Remember, (Focus keyword note: data backup procedures are crucial before reformatting to avoid data loss.)
Throughout this process, creating a backup of your SD card contents is paramount. This safety net ensures you can revert to a working state if any unforeseen issues arise.
Conclusion
Congratulations! You’ve embarked on a journey to unlock the full potential of your Nintendo Switch by booting up Hekate and enabling auto-boot to custom firmware (CFW). Enjoy the enhanced functionality and customization! This guide has equipped you with the knowledge to navigate the exciting world of How to Auto Boot to Atmosphere / Hekate.
Remember, the key to a successful loading fss0 Atmosphere setup lies in choosing the CFW that aligns with your goals (direct access with Atmosphere or menu control with Hekate) and meticulously following the configuration steps.
By understanding essential concepts like RCM mode, payload injection, and CFW selection, you’ve gained the foundation for a smooth modding experience.
Should you encounter occasional hiccups, the troubleshooting section has empowered you to identify and rectify common Auto Boot to Atmosphere issues. With a keen eye for detail and a focus on data backups, you can confidently conquer any configuration challenges.
FAQs
Is auto booting CFW safe for my Switch?
Modifying your Switch carries inherent risks. While auto booting CFW can be a safe and convenient practice, it’s crucial to follow reputable guides and exercise caution. Always back up your data before making any modifications.
Can I undo auto boot if I change my mind?
Absolutely! The process for reversing auto boot depends on your chosen CFW. Typically, it involves editing the “hekate_ipl.ini” file and changing the “autoboot_payload” setting back to its default state (which might be blank or set to Hekate). Refer to your specific CFW documentation for detailed instructions.
What happens if my auto boot configuration gets corrupted?
Don’t panic! Having a recent backup of your SD card contents is a lifesaver in such situations. Restore your SD card from the backup and re-attempt the hekate on nintendo switch Atmosphere configuration steps.
Are there any warranty implications of auto booting CFW?
Modifying your Switch can void the warranty. Carefully consider the warranty implications before proceeding.
What if I encounter issues beyond the troubleshooting tips provided?
The wonderful world of Switch modding thrives on a supportive community. If you get stuck, seek help from reputable Switch modding forums or communities. Clearly explain the issue you’re facing and the steps you’ve already taken.
Latest Post